


19. Hangtags Mounting – Urdu & Hindi | Ai | Kodak Preps
 admin | April 18, 2022
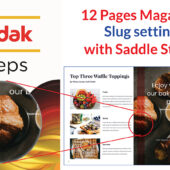
Hangtags Imposition Quickly & Easily
Welcome to our guide on how to simplify hang tags imposition. This tutorial will help you understand the process of creating and printing hang tags efficiently.
What is Hangtags Imposition?
Hangtags imposition is the process of arranging multiple hang tags on a single sheet for printing. This technique maximizes the use of paper and reduces printing costs.
Key Steps in Imposition
1: Setting Up Your Document
- Choose the Right Dimensions: Ensure your document matches the size of your hang tags, including bleed areas.
- Create a Grid Layout: Use guidelines to create a grid layout for placing your hang tags accurately.
2: Designing Hangtags
- Design Each Hangtag: Create individual designs for each hang tag using graphic design software.
- Position: Arrange the hang tags within the grid layout on the document.
- Add Cutting Marks: Include cutting marks to guide the trimming process after printing.
3: Printing and Cutting
- Print the Sheet: Use a high-quality printer to print the arranged hang tags.
- Cut the Hangtags: Follow the cutting marks to trim the hang tags to their final size.
Benefits of Hangtags Imposition
Using hangtags imposition helps in reducing paper waste, saving costs, and ensuring a consistent and professional look for your hang tags.
Extensive Tutorial Series
For more detailed instructions, watch our tutorial on YouTube or visit our website www.artistici.pk for additional resources.
Conclusion
This guide provides a comprehensive overview of how to simplify hang tags imposition. Follow these steps to achieve professional results in your hang tag printing projects.
Next Tutorial
How to impose 72 Page?
Written by admin